| This post may contain affiliate links. If you purchase something through the link, I may receive a small commission at no extra charge to you. |

INSPIRATION
I started a new memory calendar at our house a few months ago as a way to document the fun things we do as a family, and also to start building a foundation for the concept of time with my kids. I was inspired by all those planner girls out there. I never really understood the whole planner thing until I went to Silhouette Summit in May and met, Cori, The Reset Girl. She showed me her planners and told me about the wonderful planner community and all about her business adventures. She was so kind and patient and had this amazing energy about her as she shared her passion for planning. I left wanting to have a million planners to decorate and a million things to schedule in them.
Reality is, I don’t have a lot of things to plan. The kids and I pretty much fly by the seat of our pants at home. We have play dates scheduled with other friends, but that’s about the extent of it. And hauling around a planner along with everything else for kids (diapers, wipes, snacks) just wasn’t going to happen for me. There are a lot of moms that love their planners, but I just didn’t see it working out for me at this point in my life.
With the itch to somehow keep a planner I came up with our memory calendar. It has grown over the past three months and evolved to be more fun than I had imagined. I love creating little embellishments to go along with our simple adventures of the day. I plan to have the kids help create little embellishments to put on the calendar to mark their memories of fun they had that day too. For now, I’m having too much fun creating to share it with them. Ha!


EMBELLISHMENTS
(affiliate links below)
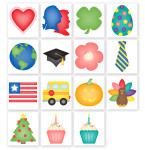
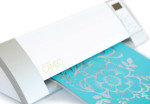
Embellishments are the funnest part of the whole calendar to me. I love drawing up designs to go along with our activities and cutting them out with my Silhouette CAMEO. My embellishments are very literal of the things we have done that day. This is for my kids. They can’t read yet, but when they see an image of their bikes by the mountains, they know that was the day they rode their bikes in the mountains. Pretty straight forward. My kids LOVE this calendar. They look at it all the time, point to a picture and then tell me all about the fun things they did that day. You can embellish your calendar any way you would like, but this is what works for us and is what my kids love.
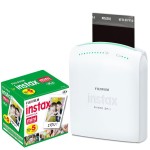
In addition to embellishing with die cuts and other paper crafts, I also use mini Instax prints from my Instax Share Printer. I can’t even tell you how much I love this little printer and the tiny photos it pops out. When I first bought it, I was a little skeptical about how much I would actually use it. I’m happy to say, I use it all the time and can’t get enough of the tiny, adorable photos. It really is the funnest little tool. I have increased the amount of photos I use on the calendar each month, as you can see by looking at the month of July. It brings the calendar and memories to life that much more. My kids love seeing pictures of themselves, but they love it even more when their friends or cousins are in the pictures with them.


CREATE YOUR OWN CALENDAR
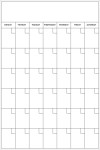
I originally created this calendar last year to be made into a little planner for kids. I loved it so much, I enlarged it for our wall calendar. The reason I love this one is because it has 6 rows of weeks. I didn’t want to have to share any squares when room runs out on the calendar, and the last day or two of the month have to share a square with the days from the previous week. All the extra space from having 6 rows gives me room to right goals, a bucket list and other fun things for the month. During birthday months, I plan to highlight the person in this area with a photo and some fun things about them. Okay, let’s get down to business and make a calendar…
- Download and print out the calendar: You can download the calendar in my store. I printed mine at Cosco photo center. It’s a 20×30″ print and is about $8. To make it reusable for each month, I put mine in a frame. You can also laminate it.
- Fill in the month and days: I used my Silhouette CAMEO to cut the letters for the month out of cardstock. I taped them on using scotch tape so I can take them off and reuse the letters for other months. The days of the month are filled in with a black dry erase marker. Nothing fancy here. :)
- Plan and embellish: The first thing I do when I have the month and days filled out, is go through and mark holidays and special events. I use these calendar cards for the majority of that process. Then I document the fun things we do each day with a memento, photo or paper embellishment. I use washi tape, scotch tape and sometimes a glue stick to adhere the embellishments to the calendar.
- Document: When the month is over, I snap a photo of the whole calendar along with some close-ups of special events that happened. I put them in an album along with all the photos I used on the calendar that month. Then I use some glass cleaner to clean the glue and marker off the calendar for the next month.
This calendar is so simple to make and you can embellish to your own taste. My family loves it and I know yours will too. Any questions or fun ideas for this calendar, please post below. I’m always looking for new ways to make this even better.
Click the image below for supplies















Amy – I LOVE this project! I have to tell you how much I enjoy all of your projects, so inspiring!
*** Service disabled. Check account status. ***